|
2.
|
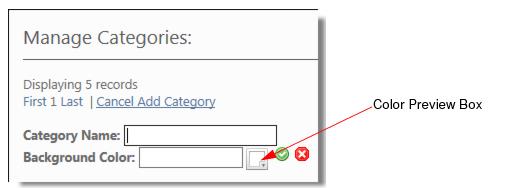
Click Add Category to display the following panel.
|
|
7.
|
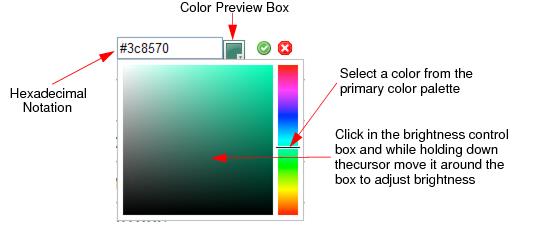
Click
|
to apply the Category name and color. The new Category appears as the last Category in the list. Click Refresh to have the new Category listed in alphabetical order.