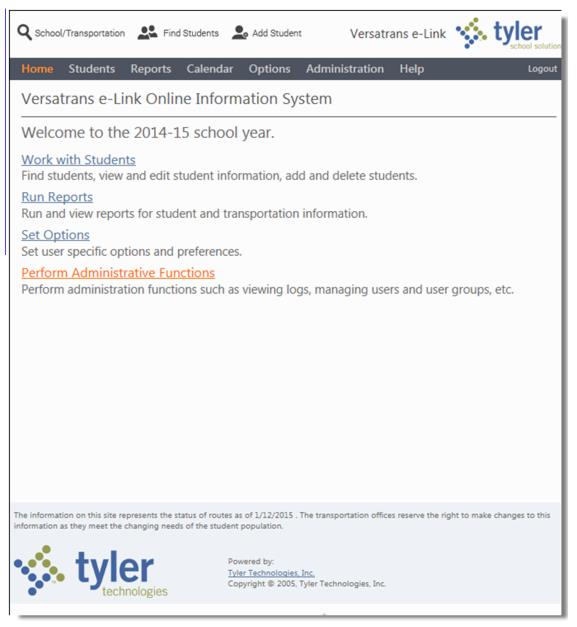
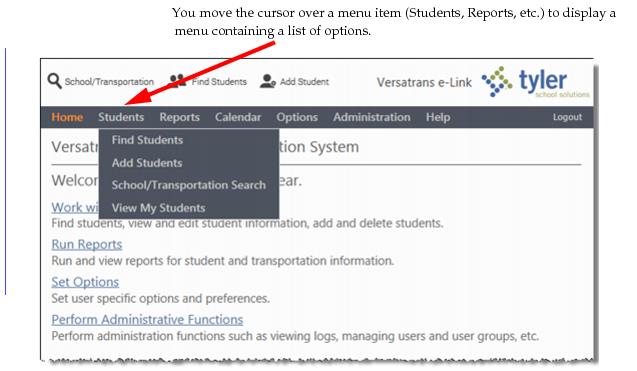
Navigating the e-Link Pages If you are familiar with your browser, you will find e-Link easy to use. After you log into the e-Link user site, the Main Screen and Menu displays. Main Screen & Menu From this screen, you have access to the entire e-Link user site. What the users sees depends upon the User Group permissions granted by the system administrator. To select a menu option, move the cursor over your selection, so that the text is highlighted in gray and the cursor is hovering over the actual text. Note: If the cursor slides off the menu, the menu will disappear. Move the cursor back over the menu item to display the menu again. Displays the School/Transportation search screen where you can enter pertinent grade, program, and address information and retrieve relevant transportation information. Displays the Student Search screen where you can find, retrieve, and edit student information. Displays the Add Student screen where you can add a new student. Students This option allows users to search for a particular student’s record, edit student information, add a new student in Versatrans Routing & Planning, and perform a school/transportation search. Reports This option allows users to print reports about students or transportation information, (i.e. Student List Report and Route Stop Locations Report). Options This option allows users to select a new password, and, if your group has permission, switch the student file. Administration This option allows you to access the most often used administrative functions of e-Link. Help This option allows you to display a context sensitive help file. You can click the entries in the Contents or Index tabs for more information about e-Link or type a word in the Search tab to display topics that are related to your question. Home This option allows you to return to the Home page from any point within the application. Logout This option allows you to logout of the application.